

This post contains affiliate links.
As you know, your elderly relative isn’t as mobile as they used to be. This can be because they have become too weak, something which you can see if they start shaking when they stand up or even while sitting down. One way to help them get around the house on their own is with outside handrails. Why is Your Elderly Parent Shaking? Common Causes
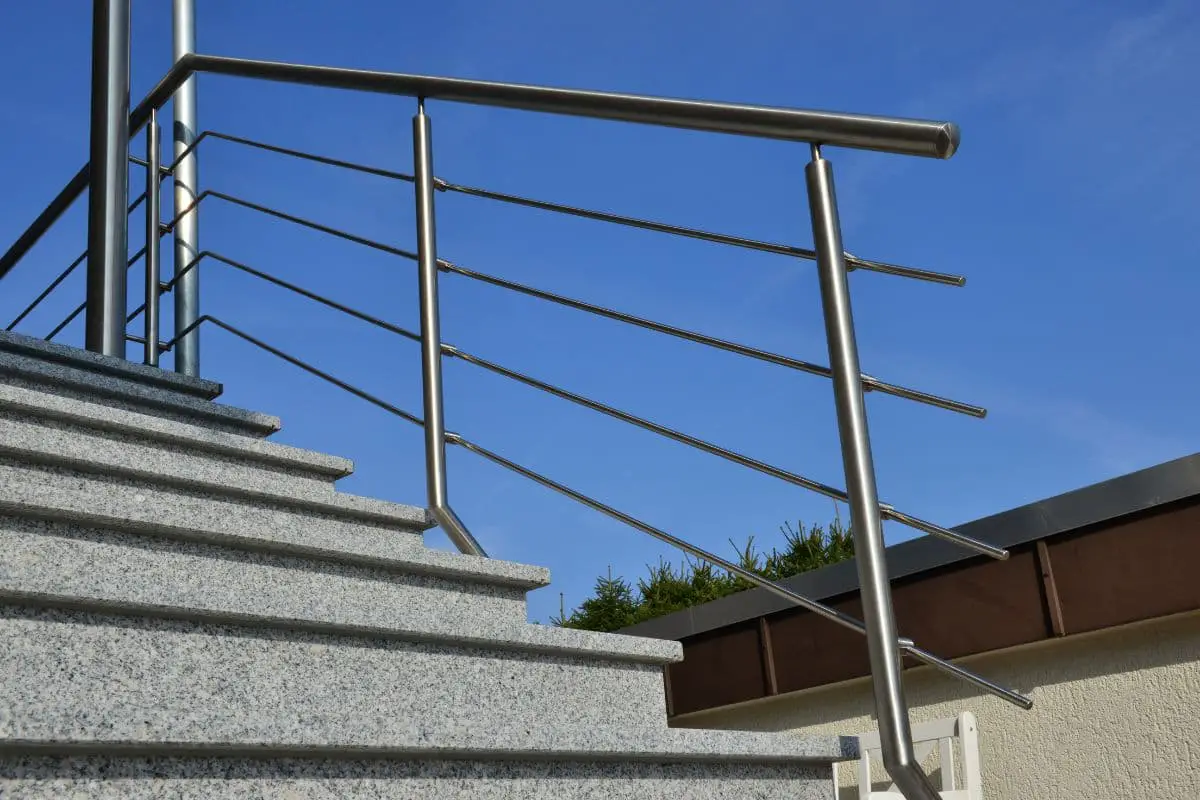
When choosing outside handrails for the elderly, consider factors like material, style, and size. To install the handrails, you need a hammer drill, a partner, and a setup that will allow those handrails to stay in place as securely as possible.
Let’s get into more detail about choosing and installing outside handrails.
1. Choose the Right Handrails
Choosing the right handrails for the elderly can be difficult. For starters, you need something sturdy enough to stay in place and with enough grip for frail hands to hold.
You should also consider the following factors:
- The ability to withstand low temperatures and inclement weather: You don’t want them to rust too quickly when wet. Otherwise, they’ll get more damaged easily and become unsafe to use. Also, they should be durable enough not to get uprooted by strong winds and the like.
- Material: Metal handrails can be a reliable option, but they must be made of stainless steel to avoid rusting. Wood is another good option for handrail material, but you need to make sure it has a finish on it. Without a finish, a wooden handrail can become splintered and absorb water, causing the wood to bloat and break apart.
- Stand-alone or not: Some handrails can stand independently and don’t need to be attached to a wall. These are convenient to install, but they may not necessarily be the most secure option. If you need to attach a handrail to a wall, however, you’ll likely need professional help.
- The number of stairs: This will help you determine the right length for the handrail. As a general rule, the handrail should be slightly longer than the set of stairs you’re installing them on. This will give the user more room to hold on to the handrail as they get their bearings.
- The thickness of the rails: You should also consider how thick or thin you want the handrails to be so they’re easier for the user to grip. Consider the size of the user’s hands. The bigger they are or the longer the fingers, the thicker the rails should be.
Don’t forget to measure the area where the handrails will be installed to ensure they cover the entire space. Use a measuring tape for this purpose.
With your measurements on hand, buy the handrails from your nearest hardware store. Alternatively, you can purchase it online. If you’re buying without seeing the handrails in person, you can contact customer service for more details on the handrails so you don’t end up wasting money purchasing the wrong set.
2. Choose the Right Drill
To install a handrail outside, you need some type of drill to securely put it in place. An ordinary drill will work if you’re installing it on a wooden porch or deck. On the other hand, you’ll need a hammer drill when working with tougher materials like concrete or brick.
I recommend the DEWALT ATOMIC 20V MAX* Hammer Drill (available on Amazon.com). It’s cordless, so you don’t have to worry about wires getting tangled on the rails while you work and potentially putting your life at risk. It’s also relatively light, meaning you won’t easily get tired while using it.
If you don’t have a hammer drill, you can borrow or rent one from your neighbor instead — especially if you don’t foresee using it again in the future. Of course, if it’s more expensive to rent a hammer drill for the time you’ll use it, you should probably buy one instead.
3. Prepare the Handrail for Installation
Now that you have your handrail and tools, you can start with the installation. You can put the handrail where it’s to be installed to give you a good idea of how well it will fit and allow you to prepare the surface for the installation. Also, since you have to drill multiple holes to install your handrail, you can figure out where those holes are supposed to go.
Ideally, you should have a partner when doing this DIY project. Your partner can help you keep the handrail straight while you install it. With your partner holding the handrail in place, measure and mark where you need to drill holes.
It’s important that you keep the handrail as straight as possible at this stage. The straighter you install the handrail, the more secure it will be and the longer it will last. Having a partner also reduces the risk that your handrail will fall over and cause you to drill a hole in the wrong place.
If you can’t get a partner, don’t worry: You can still get this done on your own. It will just take a little more patience and precision.
To install a handrail without a partner:
- Start by drilling a hole on one end.
- Drop an anchor into the hole. This allows the anchor to hold the handrail in place while you continue drilling.
- Once the handrail is secure enough that you aren’t holding it up by yourself, you can focus on drilling the remaining holes.
3. Drill the Remaining Holes
Once you mark the holes you need, you can remove the handrail and set it aside. This will free up space for you to drill safely and accurately. If you’re working with concrete or brick, you may want to have a sleeve anchor to hold the rail in place.
I suggest The Hillman Group 370830 Hex Head Sleeve Anchor (available on Amazon.com). The set comes in 12 pieces, and the zinc material makes this tool resistant to corrosion. You’ll have to drill beforehand, though.
To install a sleeve anchor, drill into the concrete or brick the same width as the anchor and down about an inch (2.54 cm) further than the size of the anchor. Giving the sleeve anchor more vertical room will help any dust or debris that falls into the hole stay out of the way and not affect how well the anchor holds.
Sleeve anchors are easy to install with a hammer drill as the drill does most of the work. Place the anchor into the hole, ensure the anchor fits snugly, and your anchors are ready to go.
When working with brick or concrete, keep your eyes open for any cracks or weak points in the foundation. While hammer drills allow you to install complex yet secure fixtures like handrails, the surface where you’re installing the rails may not have enough strength to withstand the pressure from the drill.
If you’re using a sleeve anchor and notice a crack while drilling, the whole handrail could fall over time. If this happens, move the handrail to a different location or consider using epoxy to install the handrail instead.
You’ll need a very strong epoxy like the Sika AnchorFix-2 Adhesive (available on Amazon.com). Although this epoxy works best with concrete, you can also use it on brick and hard stones. It can also come in handy for other repairs or if the railing isn’t tight enough, as the epoxy can fill gaps in the concrete or brick.
Before deciding on a concrete epoxy, make sure it can withstand outdoor temperatures and conditions. For example, the Sika AnchorFix-2 can withstand up to 120 degrees Fahrenheit (48.9 Celsius), which is far higher than what many concrete epoxies can withstand.
Fill the drilled hole with epoxy before putting the anchor into the hole. This will ensure that it holds in place even if the anchors aren’t as tight as they could be because it fills the extra space while holding everything together.
4. Put the Handrail in Place
Now, it’s time to put the anchors in place. Make sure the sleeve anchor fits snugly. Once you put the anchor into position, you can move the handrail where it should be. Hold it steady while you screw the anchor into place, ensuring the screws are as tight as they can be.
As much as possible, avoid using epoxy at this stage. If you performed the previous steps correctly, you shouldn’t have to use epoxy. Epoxy can help you fit the rails more securely in the short term, but it might not hold up for long.
Also, if the concrete or brick is severely cracked, you need to consider an alternative method for installing the handrail. Because this is for an elderly person, the handrail mustn’t come loose or fall. That can be the difference between a safe walk outside and a broken hip.
If the concrete cracks too much for you to safely use epoxy or sleeve anchors, consider drilling further down into the concrete and placing more concrete around the handrail to hold it in place. This will help fill those cracks and allow it to securely hold the handrail, as it will now be part of the concrete rather than an add-on.
To do this, hammer drill a much larger hole in the concrete. The handrail pole should fit into the hole with additional room left for adding concrete. Once you place the handrail into the hole and fill it with concrete, smooth out the surface of the concrete to better allow it to blend in with what you already have.
The concrete will need at least 24 hours to dry before you use the handrail. During the drying time, the handrail mustn’t move. You need to brace the handrail or use other means to ensure it doesn’t move.
You can do this with whatever you have available, such as a few 2x4s. Prop the 2x4s up against the railing and anchor them to each other or the ground. Make sure that no wind can move the railing while it sets. The 2x4s will also serve as a warning to others not to use the handrail yet.
Once the concrete dries, remove the braces.
5. Test the Handrail
Since this handrail is to help an elderly person get around easier, you must test the railing once you complete the installation process. Again, make sure that materials like epoxy and concrete have completely dried before you use the handrail. Otherwise, you may have to make corrections that will force you to redo the installation all over again.
Test the handrail by using it yourself and putting most of your weight on it. You can put a mattress nearby to help cushion any falls in case you have an accident. If the rails aren’t safe for you, they’re likely more dangerous for your elderly relative.
Make sure the handrails aren’t too slick and that you don’t have any issues gripping them. If the handrail is too slick, you can wrap the whole thing in grip tape.
You can also fix a slick handrail by adding textured paint or handrail covers. These aren’t common methods for outside handrails, but if they can help your elderly relative get a better grip, they’re better than nothing.
If you feel the handrail coming loose when you put your weight on it, check what’s causing the issue. The epoxy or concrete might not have dried thoroughly, or the sleeve anchor may not have been as secure as it should have been.
6. Install Another Handrail
You may want to install another handrail on the other side. That way, even if one of your loved one’s hands is injured, they can easily grip the handrail with their stronger arm. Also, if they lose their balance on the steps or begin to feel dizzy, having another handrail can give them something close by to grab onto. Follow the same steps as above for installing the second handrail.
By now, you should have a thorough understanding of installing handrails. If you want to continue learning about keeping your elderly parents safe and happy, check out our article on the safety of lift chairs. Are Lift Chairs Safe for the Elderly? The Facts Explained
Final Thoughts
Taking the time to install a secure handrail can make a big difference in preventing accidents and allowing your elderly relatives to maintain their independence. So, use the tips above to choose and install handrails for your loved one. Of course, if handrail installation seems like a tall order, you can always contact a professional instead.
Tenuto Properties LLC dba Growing Gray USA is a participant in the Amazon Services LLC Associates Program, an affiliate advertising program designed to provide a means for sites to earn advertising fees by advertising and linking to Amazon.com. We also participate in other affiliate programs which compensate us for referring traffic.